Our Easter was low-key as Hubby had to work. I had a ham, baked sweet potatoes, asparagus, and a Lemon Merigue pie ready for supper when he got home. No Easter Bunny appearance for us old fogies. We did have a new calf though and Momma and baby are doing just fine. Hubby thinks it may be the last calf as he doesn't think the other two cows left will calve at all. They are both getting up there in years. It's Good to be Livestock 60 miles North of Nowhere. You don't go to the Canner when you get old -- you get to RETIRE! Gadzook, I hope I have it that good.
CASSEROLE PAN CARRIER PROJECT
This casserole carrier came about as a project for a wedding gift. I could not find a pattern I liked -neither commercial nor a freebie on the web. So I made my own. This will easily fit a 9 x 14 pan, and maybe a little larger one. And We're Off....
SUPPLIES NEEDED
Freezer paper for your pattern or some other big sheet of paper, or scotch tape some together.
1 1/3 yards of 45" wide material - (need a length 48" x 45")
insulating material like quilt batting (I like Thermolam because it insulates better)
pencil, ruler, scissors
fat quarter of contrasting fabric to make binding or a package of binding.
thread, sewing machine, pins
MAKING YOUR PATTERN.
We are going to make a pattern in a FAT L shape. Fold it width wise so it's at least 18" tall and 13" wide.
The fold is on the LEFT side -- opposite the scissors, not the scissors side.
The L is 17 inches tall, 8 inches wide at the top, and 12 inches wide at the bottom. The bottom of the L is 6" tall.
17 inches tall - the left edge of the paper is folded.
Dimensions again: 8" at the top, 12" at the bottom, the bottom L part is 6" tall.
CUTTING THE FABRICS:
Now you have your pattern and we are ready to cut our fabric.
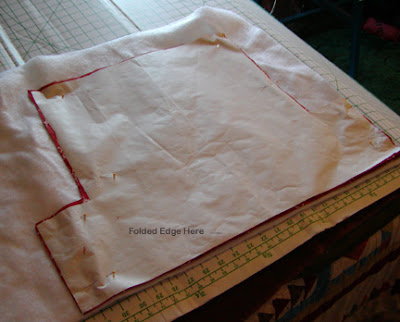
Unfold your pattern so it looks like the above and place the bottom of the L on the fold of the fabric.
Cut out - repeat.
The long top strip will become our handles and the two rectangles could become matching pot-holders if you like. ZERO waste!!! Am I good or what! :)
Our Handle Strip
Now cut one out of your insulation material - again on a folded edge. If you really want to re-purpose,
you could use an old blanket or towels as the insulation layer.
Now make a sandwich - fabric, insulation, fabric. At this point I will pin so I can quilt them together. Raw edges remain all the way around if you are not a quilter. Just so you know.
I pin through all 3 layers with regular old safety pins. And I close them. Some people like the curved quilting pins and leave them open. I use 3" regular safety pins and find them easier to use.
Okay -- all for today. We'll continue in a few days with the quilting together (and you could probably skip this step) and then sewing and binding the project.
Oh and why the red bandanna material you ask? Because I have 15 YARDS of the stuff. Have to use it for something!! How did I come to have 15 yards. Don't ask - had something to do with ebay.........


