Showing posts with label casserole carrier. Show all posts

Sunday, June 5, 2011

CARRYING ON TO THE FINISH!!! of the Casserole Carrier of Course.

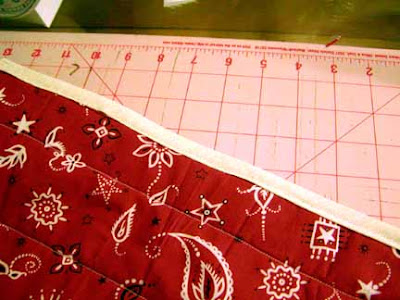
The binding from the top after it's stitched in the ditch.

The binding from the bottom after stitching in the ditch.

Remember that long skinny strip we had left after cutting out the casserole carrier? It's going to become our straps, so trim it down to around 3" - 3 1/2"wide.  Then join the ends and sew a 1/4" seam (careful you don't get a Loopy twist in it)

Press under a 1/4 inch on both sides and then carefully press together, wrong sides together.  I then use 2 decorative stitches on both sides just off the edges to seam it up.  The stitching also adds strength to the strap.

Finished Strap ready to be attached.

Mark the centers of your straps with a pin and then pin those centers to the middle of the bottom of the carrier, placing them so they will run over the open flaps.

Stitch the straps to the 'bag'.  DO NOT stitch them up the sides or it will 'pull' the carrier open when you carry it. You can go a little ways up the sides but don't go all the way.

I like to make a box with the seaming where I ended the stitching to the bag on all four corners for reinforcement.

Place velcro vertically on the flaps (then you can 'adjust' closing it).  On the underside of the top flap and the top of the bottom flap.

stitching on the velcro

Velcro placement with my oversized pan in the carrier.

For the Coup de Grace' I like to place to small strips of elastic for a spoon holder.

The completed Carrier-ready to be sent off to it's new owner, Nancy.
Nancy really earned this casserole carrier.  On her blog HERE at Wyoming Breezes I won THESE.  I was Thrilled beyond words and I have worn my pair almost every night after I take off my sandals.  Ironically, I found Nancy's blog looking for information on knitting--especially socks!  I swear I will simply have to learn to knit socks myself.  What a special treat a pair of hand-knitted socks are.  I seem to have problem though, called co-ordination and Thumbs...but I know practice will make perfect.  Just need more practice, right?
Sewing tip - see the bag duct-taped to my sewing table? It's an old heavy plastic produce bag and it's now resides as my 'scrap n' thread tags' bag.   It's so much easier to dump them in there rather than throwing them over my shoulder like Eleanor does :)  I suspect she doesn't clean up after herself.

DONE - I almost feel like I have finished a major UFO here it's taken so long.   There are 3 installments to making this carrier for anyone new.  Next posts will be about my trip on the Coast Starlight! It was a Grand Memorable Trip and I hope you will enjoy my blogging about it.

Saturday, June 4, 2011

Binding the Casserole Carrier

We will FINALLY Proceed with finishing our casserole carrier.  If you are like me, your 'sandwich' is not too precise so you will need to trim it so it's nice and neat.
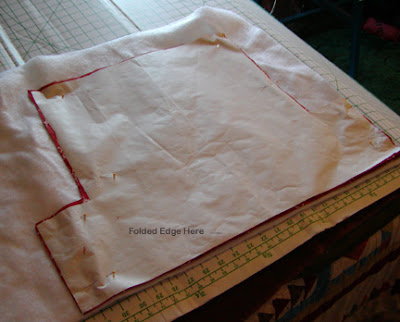
 Trimming Away the Excess

Results After Trimming - Nice & Neat!
Next you will either need WIDE bias tape or if you are like me, I like to make my own.  There are numerous tutorials on the web on how to make your own bias tape.  I usually cut mine a bit wider than they say; at least 2 1/2 inches wide as it gives me more 'room' to fold it over.  First Sew the bias tape to both ends of the short sides of the casserole carrier.


 Sewn to both short sides

 Now we are going to fold it over and press it down and pin.  I don't like to hand sew particularly so on projects I am not fussy about, I carefully pin it 'the ditch' so I can then flip it and sew in the ditch and catch it on the opposite side.  This photo shows the pinning on the underside.
Stitching in the Ditch from the Top
Sometimes I don't get it quite right as here if you can see I missed catching it on the underside (by the 9 line).  I just go back and catch it.
Next we create our box corners, flip up the short, just bound flap till you have a nice square corner and sew with about a 1/2 inch seam.  Note your seam is on the OUTSIDE of the box--not inside.

The sewn corners create the 'box'.
Now we are going to place our bias tape along the just sewn 'box' seam and along the flap that will cover the top of the 'box' mitering our corners.  Again if this is new, there are numerous tutorials on the web on how to miter your corner with bias tape.  At the beginning and ending -- both will be at the start of the 'box' seam, turn under 1/4 inch of the tape and let it slightly overlap so you don't have a raw edge showing.

One side done - one to go

Next time - finishing the casserole carrier and then after that one, we will go on to my trip via the Coast Starlight. 

If you find any of my instructions confusing, please let me know and I will try to clarify them for you.  Plus I have a surprise ending to this casserole carrier.

I have SO much to blog about after being 'internetless' for almost 3 weeks.  My hi-speed router died and I swear I almost went with it!! I never realized how much I depended on it until it was gone.


Sunday, April 24, 2011

Spring is Close - and we start Our Casserole Carrier

I hope everyone had a Happy Easter.  It was Finally Semi-Warm (60) at North of Nowhere but we have more cold and rain/snow (snain) predicted in the next week.  Ah yes, spring in Wyoming.   You wear your snow boots, mittens and a Coat.  And Think about Summer.

Our Easter was low-key as Hubby had to work. I had a ham, baked sweet potatoes, asparagus, and a Lemon Merigue pie ready for supper when he got home.  No Easter Bunny appearance for us old fogies. We did have a new calf though and Momma and baby are doing just fine.  Hubby thinks it may be the last calf as he doesn't think the other two cows left will calve at all.  They are both getting up there in years.  It's Good to be Livestock 60 miles North of Nowhere.  You don't go to the Canner when you get old -- you get to RETIRE!  Gadzook, I hope I have it that good.


CASSEROLE PAN CARRIER PROJECT

This casserole carrier came about as a project for a wedding gift.  I could not  find a pattern I liked -neither commercial nor a freebie on the web.  So I made my own.  This will easily fit a 9 x 14 pan, and maybe a little larger one.  And We're Off....

SUPPLIES NEEDED
Freezer paper for your pattern or some other big sheet of paper, or scotch tape some together.
1 1/3 yards of 45" wide material  - (need a length 48" x 45")
insulating material like quilt batting (I like Thermolam because it insulates better)
pencil, ruler, scissors
fat quarter of contrasting fabric to make binding or a package of binding.
thread, sewing machine, pins

MAKING YOUR PATTERN.

We are going to make a pattern in a FAT L shape.  Fold it width wise so it's at least 18" tall and 13" wide.
The fold is on the LEFT side -- opposite the scissors, not the scissors side.


The L is 17 inches tall, 8 inches wide at the top, and 12 inches wide at the bottom.  The bottom of the L is 6" tall.


17 inches tall -  the left edge of the paper is folded.

Dimensions again: 8" at the top, 12" at the bottom, the bottom L part is 6" tall.

CUTTING THE FABRICS:
Now you have your pattern and we are ready to cut our fabric.
Unfold your pattern so it looks like the above and place the bottom of the L on the fold of the fabric.
Cut out - repeat.

Your cut-out fabric will look like this:
The long top strip will become our handles and the two rectangles could become matching pot-holders if you like.  ZERO waste!!! Am I good or what! :)
Our Handle Strip


Now cut one out of your insulation material - again on a folded edge. If you really want to re-purpose,
you could use an old blanket or towels as the insulation layer.
Now make a sandwich - fabric, insulation, fabric.  At this point I will pin so I can quilt them together.  Raw edges remain all the way around if you are not a quilter.  Just so you know.
I pin through all 3 layers with regular old safety pins.  And I close them.  Some people like the curved quilting pins and leave them open.  I use 3" regular safety pins and find them easier to use.

Okay -- all for today.  We'll continue in a few days with the quilting together (and you could probably skip this step) and then sewing and binding the project.

Oh and why the red bandanna material you ask?  Because I have 15 YARDS of the stuff.  Have to use it for something!!  How did I come to have 15 yards.  Don't ask - had something to do with ebay.........